


 Here's a pic of the print that I gave out for a Christmas Gift to a lucky few this past holiday (you know who you are) sans the show logo and my blog tags. It was about 11 x 15 with a white border around it and it looked super sweet on gloss paper. Very happy with the painted backgrounds and color work I did on my Mystery Incorporated work, and since I was busy working on it and didn't have time to shop, I decided a week before Christmas to get some quick prints made and I just signed and handed them out as a gift. I thought I'd post it here for everyone else to see! Hope you enjoy!
 I normally don't recommend stuff on my blog but I feel compelled to for this great item. I bought a TomTom XXL 540TM 5-Inch Widescreen Portable GPS Navigator (Lifetime Traffic & Maps Edition) on Black Friday weekend after this past Thanksgiving and I have to say that this was the best money I've spent in a looooonnnnnnnng time. I got it at Staples (on their Black Friday sale which I saw in the sunday paper) and it only cost me $130 on sale. They retail it for $250 at most places, though you can find it cheaper online, but $130 was the best price around here at the time and it's one of the most popular TomTom GPS devices bought today.
 It's incredibly easy to use and I had it up and working rather fast right out of the box. I downloaded the software and plugged it into my computer so I could download the current set of maps that it has and this TomTom version has FREE lifetime support for new maps, which is great since the roads in this country can change up to 40% per year. It's been a big help to me driving to different events recently and has made my life easier and less stressful as I used to hold printed out directions from MapQuest, which were sometimes faulty. The problem was constantly looking down and reading the directions, which was especially tricky at night when it's hard to see in the dark. I have mine stuck on the windshield next to the rearview mirror so it's pretty much in front of me but doesn't obstruct my view of traffic. I shall sing the high praises for this new gadget in my life! I've used it at night while driving back from some places and it's fantastic with it's night vision look. Just follow the red arrow. Greatest invention since the iPod in my mind! This is the TomTom product that I would recommend to anyone if they want to get to where they are going to in a fast and safer manner.
  Here is a teaser piece for some of my Mystery Incorporated work I finished up and will be out this summer or late summer I think. Enjoy! For the process junkies, this was drawn on paper and then scanned and then inked in layers in Illustrator and then all painted in Photoshop. Backgrounds were painted in Photoshop too. Everything is layered and I think it's about 37-40 layers total for this file. Took about two days from initial concept to finish.
Here is one of my drawing videos that I just loaded up to YouTube. I've been running it at my speaking engagements of late and so here it is for the rest of you out there in Internet Land. It's speeded up and cut to Scooby music which was all done by John Tatarelli for me. You can check out the real time, higher quality videos of it on my vimeo page (click here). They don't have any real soundtrack to the real time ones though so you can play your own music to it. This was just a teaser to get some advertising for myself.
Here is a direct link to the YouTube as well! Click Here
 It seems I'm on tour this week with speaking engagements but this is the last one for a little while. Tonight I was at the Alfred G. Waters Middle School in Middleton, Delaware for their annual event called "Real Men Read", which is an event to promote reading in general but also for men to get their sons into reading by showing them that it's fun. Apparently, there are a lot of kids who don't like to read on a daily basis unless they are forced to for school or for homework assignments, so any program where families can come and see writers and illustrators and then purchase some new books is a good thing.
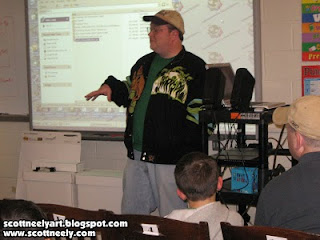
 Here's me talking and to a packed house as well. They said they had over 600 people who came last year and I was busy so I don't know how many attended this year. There was great traffic coming and going. UPDATE: Was told today that there were around 900 attendees this year!

 Showed one of the drawing videos I made that was speeded up so they could see how I draw from start to finish.

 It was a great mix of families and age groups!
 Me talking about construction theory and how characters are built from the ground up...
 This picture I thought was funny. Look at the guy in the middle tugging his kid to leave and the kid doesn't want to go yet... Can you blame him for wanting to stay? I'm a compelling guy (no, really)... plus I was only half done my Scooby sketch!
 Throwing some quick inks down on Scooby as I had to then set up my store in another room and sell some product to my breathlessly waiting crowd of fans... Hope they had a good time and enjoyed my workshops!


 After my appearance last week I was told that the younger students and their teachers were upset that they didn't get me to see me in their classes, so arrangements were made early this week and I went back today and spoke to six classrooms filled with the little ones. I mostly sketched for them and just answered questions and didn't do any slide shows since I was moving between classrooms every 30 minutes and their attention spans are shorter. It was a long morning but they seemed to enjoy it a lot and a little girl in the kindergarden class gave me two thumbs up, which was pretty funny. They all agreed my Scooby jacket was awesome, which of course it is. Each class kept all the sketches I did and I signed one for the class to hang if they wanted to. I'm a hero to the six-year-olds! The harder ones to draw for were the kindergarden class as they really don't know any of the characters (since they were so young) that I do outside of Scooby, Phineas and Ferb, Mickey and Winnie, and a Charlie Brown sketch I did.


 Last week, on February 4th, I was invited to appear for 'Career Day' at St. Eugene's Elementary School in Primos, Pa, which is close to where I live. I spoke to three different classes and talked about what I did with slide shows, my drawing videos, and then did some actual sketching to show them how I draw.


